Authentication:
All API calls require a Bearer token passed in the header.
The token is valid for 1 hour. For continued access, reauthenticate (for testing) or implement a refresh token mechanism (for production).
Authenticate process is detailed below.
Download API Definition:
Each API definition can be downloaded in either YAML or JSON format from the link at the top of the OpenAPI file. These files are located in the API Documentation tab on the sidebar.
Each API definition will have its own download for that product.

This is an image for reference and is not clickable. Please navigate to the API Documentation tab on the sidebar to access the OpenAPI files.
- Choose an API Testing Environment
- Examples of these are:
- Postman
- Bruno
- Examples of these are:
- Import the API Definition
There is No Limitation to These: You can use other API testing tools as well.
Authentication:
In Postman:
- Set the base URL to the server name.
- Create a script to update the token variable for subsequent endpoint calls.
- Set the authentication to following endpoint to 'Inherit from Parent'
Postman Documentation
In Bruno: - Set the base URL to the server name
- Create a script to update the token variable for subsequent endpoint calls:
- In the collection settings, go to the “Auth” tab.
- Choose the appropriate authentication method (e.g., OAuth 2.0, Bearer Token).
- Configure the authentication details and set up a script to update the token variable. You can use the
Pre-request Scripttab to write a script that fetches and updates the token2.
- Set the authentication to ‘Inherit from Parent’:
- For each request in your collection, go to the request settings.
- In the “Auth” tab, select “Inherit from collection” to use the authentication settings from the collection level2.
Bruno Documentation
Testing in Browser:
The Authenticate process will be identical for each API Product.
This example uses the Sandbox Environment
Step 1: Acquire Authenticate Token
Select the Authenticate endpoint.
Click the "Try it" button to test the endpoint directly on-screen.
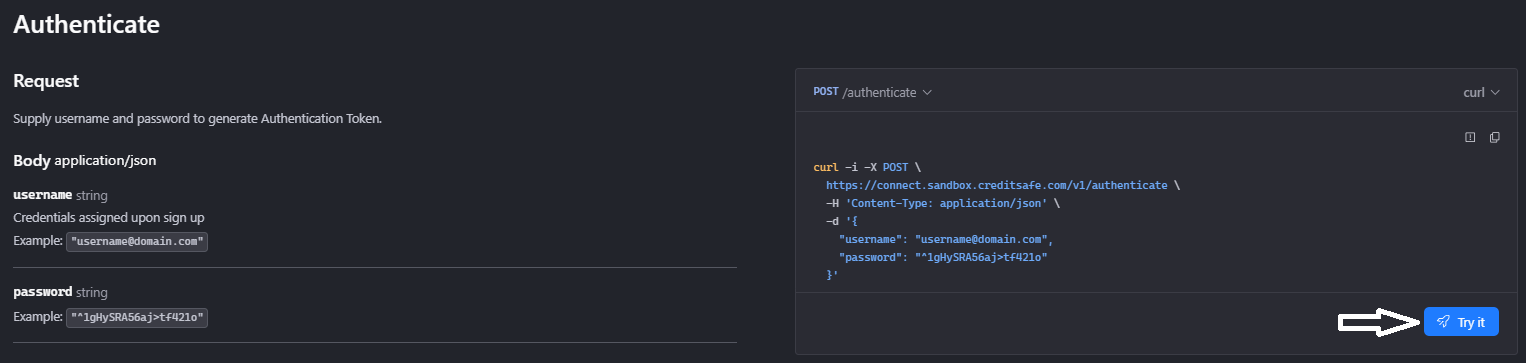
Select the environment in the top-right corner.
Enter your
usernameandpasswordin therequestBody.Submit the request.
Copy the returned token.
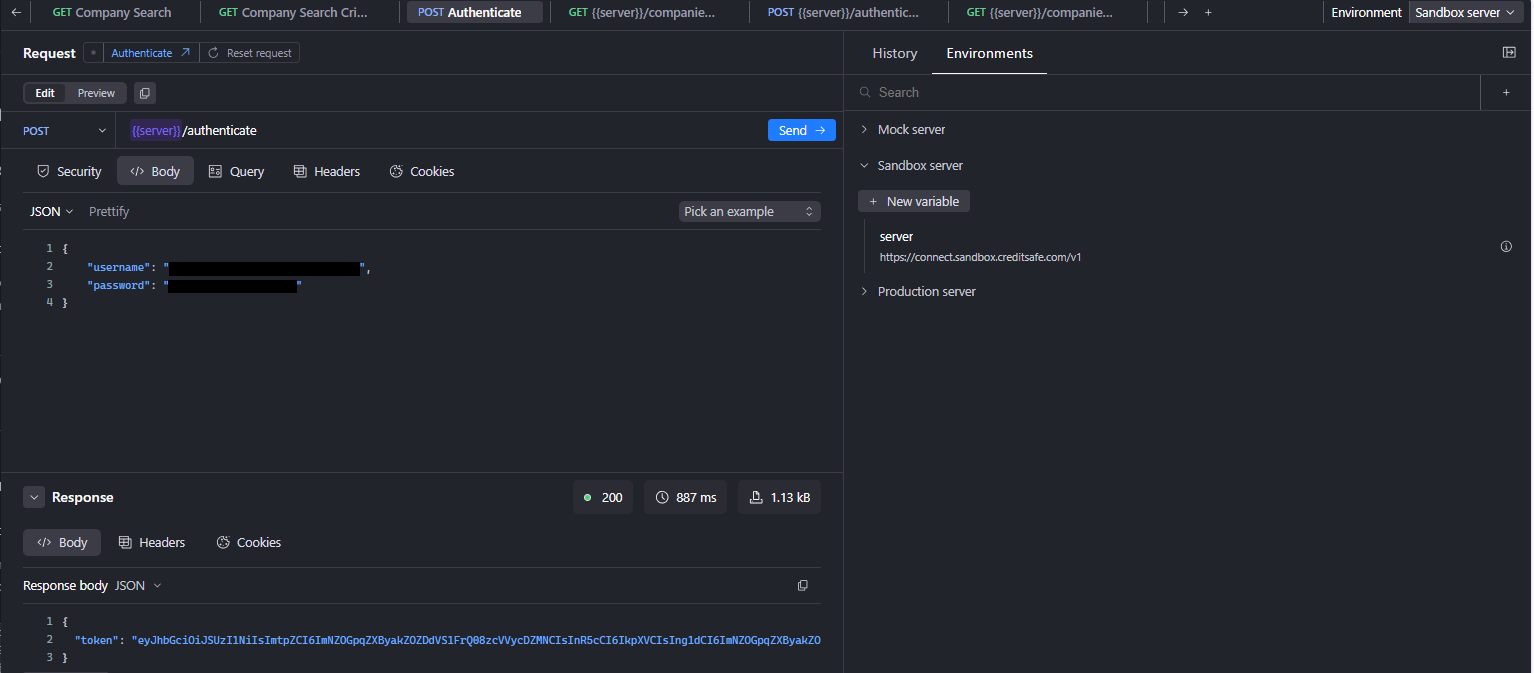
Step 2: Use Authenticate Variable
Select the required endpoint.
Click the "Try it" button.
Go to the Security tab.
Ensure the
Authorizationtype is set to JWT.
Complete the following steps:
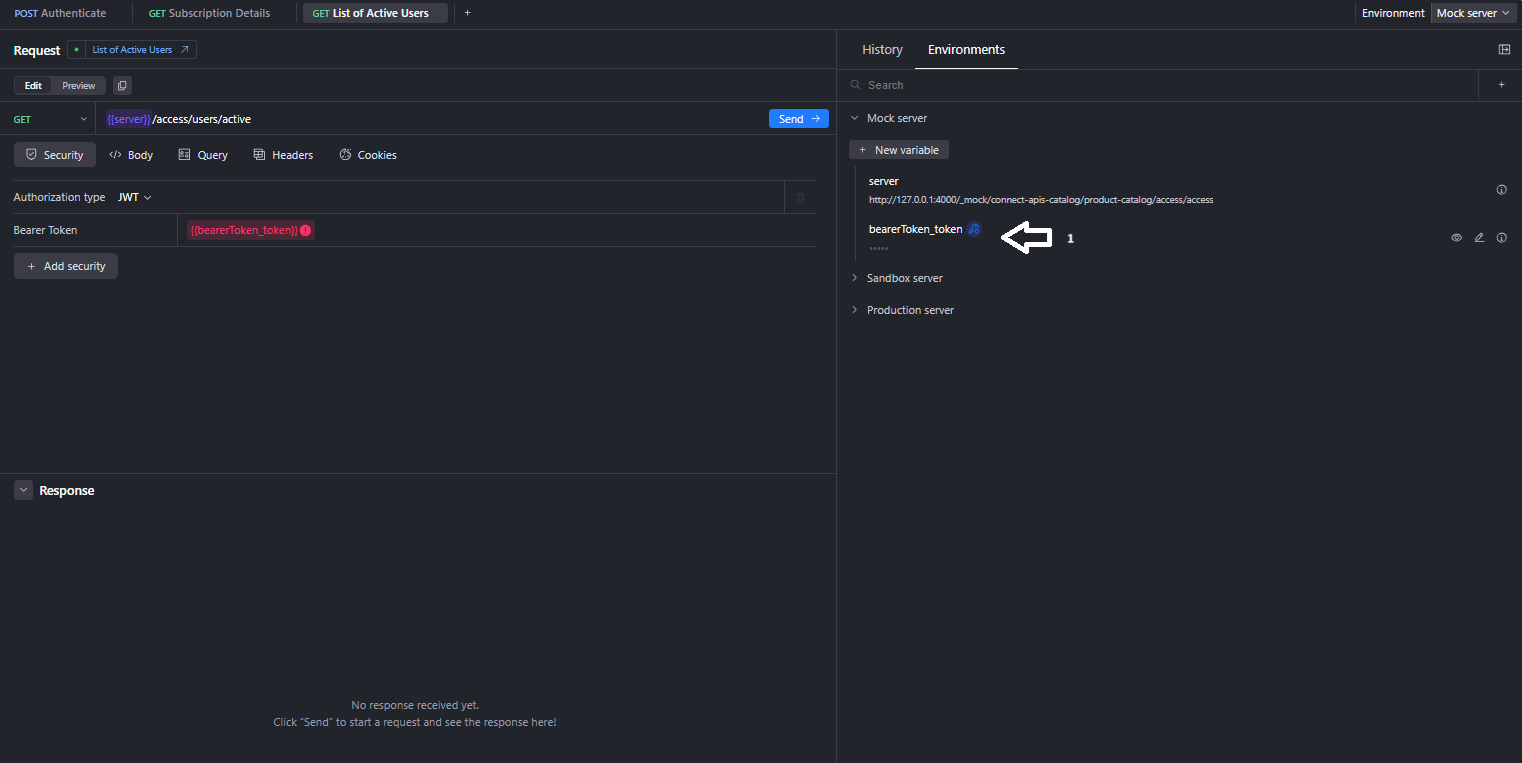
Point 1:
- In the Environments tab, under the required environment, the authenticate variable should be automatically created.
- If the variable exists, proceed to Point 2.
- If not, create a new variable:
- Click + New Variable.
- Enter a name for the variable.
- Set the value to the bearer token created from the Authenticate endpoint.
- Enter the {{variable name}} in the Security tab for the endpoint being tested. This allows the token to be used.
Point 2:
- Edit the variable information:
- Name: bearerToken_token (This should be pre-populated by the security schema.)
- Value: Paste the bearer token from the Authenticate endpoint.
- Save the variable.
Location:
All API documentation and resources can be found on the sidebar.
All endpoints are detailed in the API documentation section.
Error Responses
Descriptions:
Detailed descriptions of what has happened are provided in the Error Responses.
Companies may handle errors differently based on their own policies.
By following these steps, you can quickly get started with integrating and testing the API. For more detailed instructions and examples, refer to the comprehensive API documentation.